


Advertising
12 Apple ad campaigns spanning over 40 years — The hits and misses
8 min read
By Mario Neto
The cookieless world is fast approaching, and businesses need to be prepared. One way to do this is to use the Facebook Conversions API (CAPI). Many browsers are now blocking third-party cookies by default, there are ad and cookie blocker extensions for most browsers and even Apple, after their iOS
The cookieless world is fast approaching, and businesses need to be prepared. One way to do this is to use the Facebook Conversions API (CAPI).
Many browsers are now blocking third-party cookies by default, there are ad and cookie blocker extensions for most browsers and even Apple, after their iOS 14 update, has tightened the leash on collected data from their users.
CAPI is a good solution to this problem. It allows businesses to track conversions even if users have cookies blocked or disabled. It also provides more accurate and reliable conversion data than cookies can.
In this blog post, we will discuss what CAPI is, how it works, and the benefits of using it in a cookieless world. We will also provide instructions on how to set up and use CAPI.
The Facebook CAPI, formerly known as Facebook Server-Side API, allows advertisers to send web events from their servers to Facebook.
CAPI will help you push event and conversion data to Facebook Ads Manager while maintaining user privacy.
If the word API scares you (like it does me), let me break down how all this works. API is an acronym for application programming interface and it’s the most common way different apps and systems communicate with each other.
With Facebook CAPI, you can send data you capture from your system (like Shopify for example) to the Meta Ads Manager.
This might sound similar to the Facebook Pixel: you place the pixel on your site and Meta collects that event and conversion data for Ads Manager.
The difference is that Facebook is the one doing the capturing and data collection. With Facebook CAPI, you’re using your data (customer id, order id, purchase events, offline events etc) and then giving that to Facebook.
In this article, we’re going to cover everything you need to know about Facebook Conversions API.
So Facebook Conversions API is not a replacement for your Meta Pixel nor is it the ultimate solution to keep everything as it is before this cookieless world. It’s here for you to use in parallel with your Meta Pixel.
The Meta Pixel allows Facebook to do two main things:
For the most part, this is all we needed when we were allowed to use cookies. The only major cause for reporting discrepancies from our data (again like Shopify or a CRM) and with Facebook’s data was due to the use of ad blockers.
Now with tracking limits and the necessary changes Facebook has to make to comply (like aggregated event management), there will be an even bigger gap in conversion data.
This is where Facebook CAPI comes in. With data from the Meta pixel and your “server” (your ecom/CRM data), Facebook can improve reporting and measuring conversion events.
Then you might wonder if this will create duplicate conversion events, one you sent through the API and one from the pixel. But don’t worry, Meta has a solution for this already.
Built in to Facebook CAPI is an auto deduping process to ensure the same events captured by the pixel aren’t counted twice as long as you’re sending Meta’s required parameters, which are the Facebook Pixel’s eventID and event_name.
After you’ve set up sending events through Facebook CAPI, you’ll see a tool called Event Match Quality in your Events Manager which you can use for each individual event.
It will score how well Facebook is matching your provided data to a Facebook account.
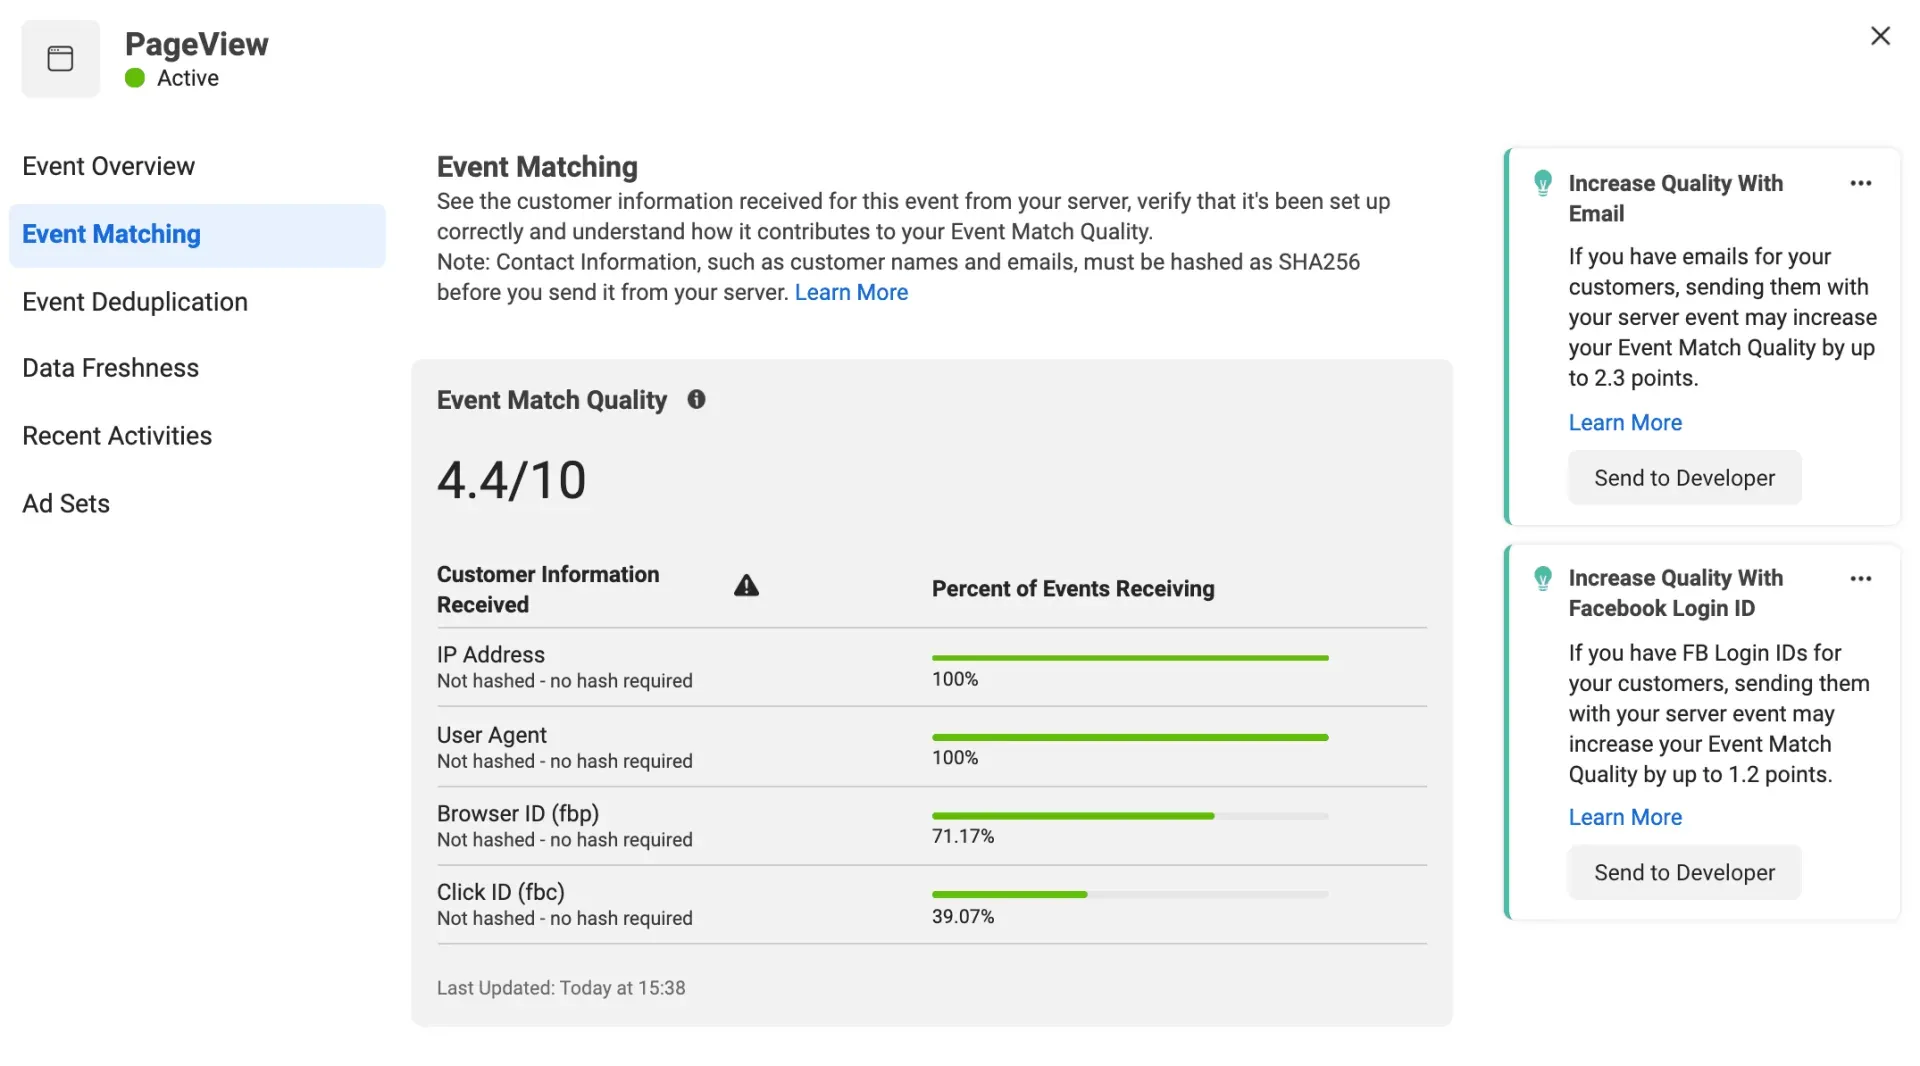
Facebook CAPI relies on user data keys such as first name, last name, email, phone number, city, state, type of browser, and IP address.
These user data keys are unknown for website visitors unless they choose to sign in or sign up for something. So most of the time, Facebook CAPI will use less reliable data keys such as browser ID and IP address.
Therefore, expect to see a lower Event Match Quality score on events such as Page View or View Content, since anonymous visitors can trigger these events and there’s not enough data to match them with.
The highest scores will come from logged-in customers.
The good news is you can choose to track any of the events you're already familiar with, not just purchases, with the Facebook CAPI.
So, for example, you can track content views, pageviews, newsletter signups, subscription changes, offline events and of course, purchases.
You’re probably already familiar with your most important events, but here’s what I recommend for ecommerce brands:
With these core events at the minimum, you’ll be able to get the most out of Facebook CAPI in regards to better ad reporting and management.
You’ll be able to more accurately measure ROAS and other cost-per-metrics associated with your funnel.
Before getting started with the Facebook CAPI, there are some things you need to do first like installing the Facebook Pixel and using Business Manager.
If you don’t have the Meta Pixel set up yet, or are completely new to all this, then start with our Facebook ads for ecommerce guide first.
Before showing you how to implement the Facebook CAPI, let’s first look at direction integrations, which is by far the easiest way to implement it.
Last October, Shopify released a new feature in their dashboard: the Maximum option found in the Data Sharing tab. This option allows you to set up the Facebook CAPI for purchase events.
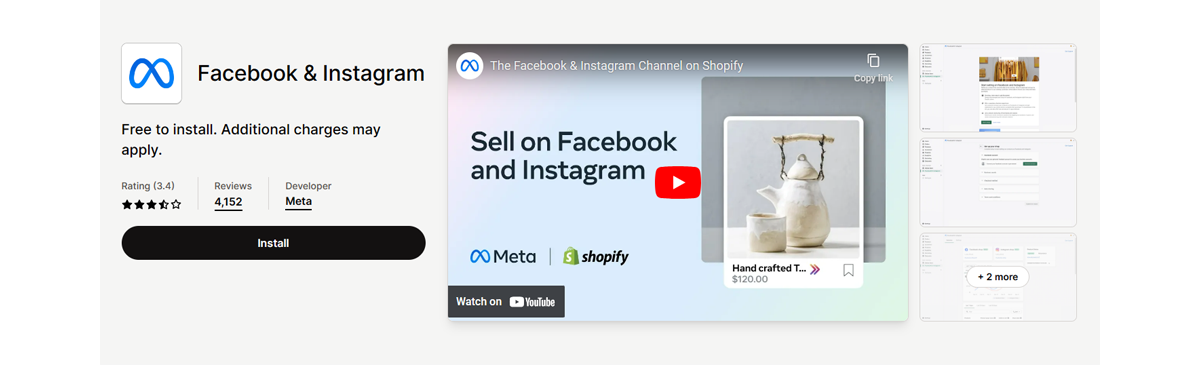
If you don’t have it installed already, head to “Apps” in the sidebar from your Shopify dashboard, find the Facebook app, and install it. Follow the prompts to complete the installation and set up.
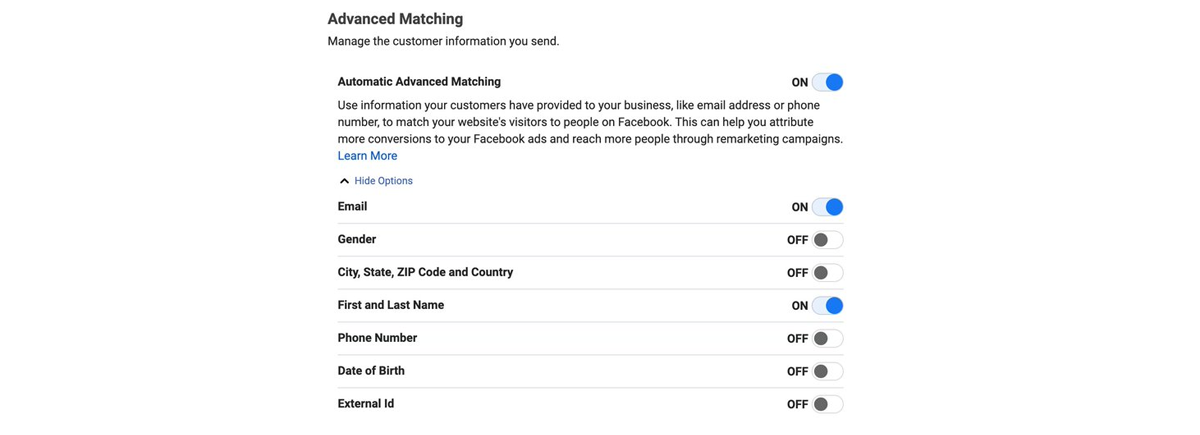
When the Shopify settings pop up appears, not only will you need to select the right business manager, catalog, profile, page, and pixel, but you also need to turn on “Automatic Advanced Matching.”
In the following prompt, you’ll be asked what Shopify is allowed to do with your Meta account. Make sure all functionality is set to “yes”.
Now that the Facebook Sales Channel app is installed, you’ll see “Facebook” under sales channels in the sidebar of your Shopify dashboard. Click it and go to the settings tab, then scroll down and click the “Data sharing settings” link.
Go to “enable tracking” and toggle it on, set “tracking level” to "maximum", and ensure the right Meta pixel is selected under “behavior will be tracked with this pixel”.
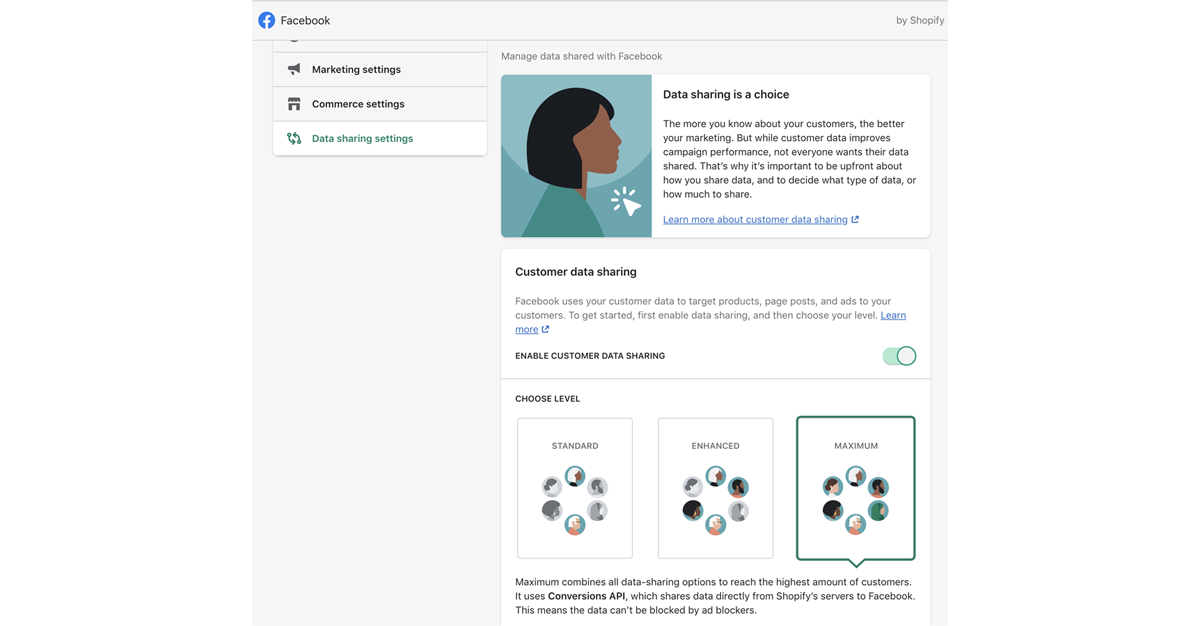
Click confirm to save your configuration.
It’s important you don’t have your Facebook Pixel duplicated on your website and firing more than once for individual server events.
So, if you have your Facebook pixel hardcoded on your site, you’ll want to remove it.
If you set your Facebook Pixel in your general Online Stores preferences, you’ll want to remove it there as well and instead click the new “set up Pixel” button underneath it that appears after setting up the Facebook Sales Channel app.
Now there’s two things to test. First, download the Facebook pixel helper browser extension for Chrome.
Go to your site, click the Facebook pixel helper extension, and it will diagnose whether there are any issues with your Facebook Pixel implementation.
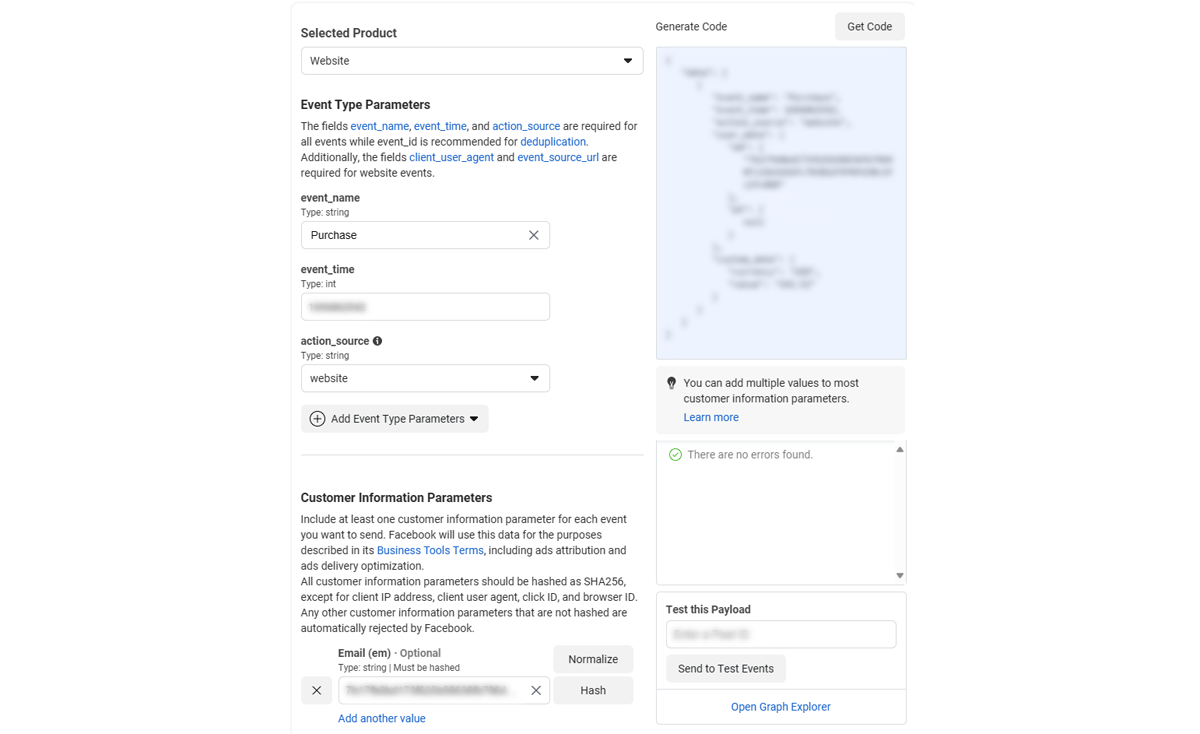
Second, test whether the data you’re sending through the Facebook CAPI is correct by using Facebook’s Payload Helper tool.
Just enter your Pixel ID in the “test this payload” box and click the “send to test events” button.
If you’re not using Shopify, Facebook has a number of partner integrations with various platforms you can use. In Ads Manager, go to your Events Manager and click settings. When you scroll down, you’ll see information about Facebook Conversions API.
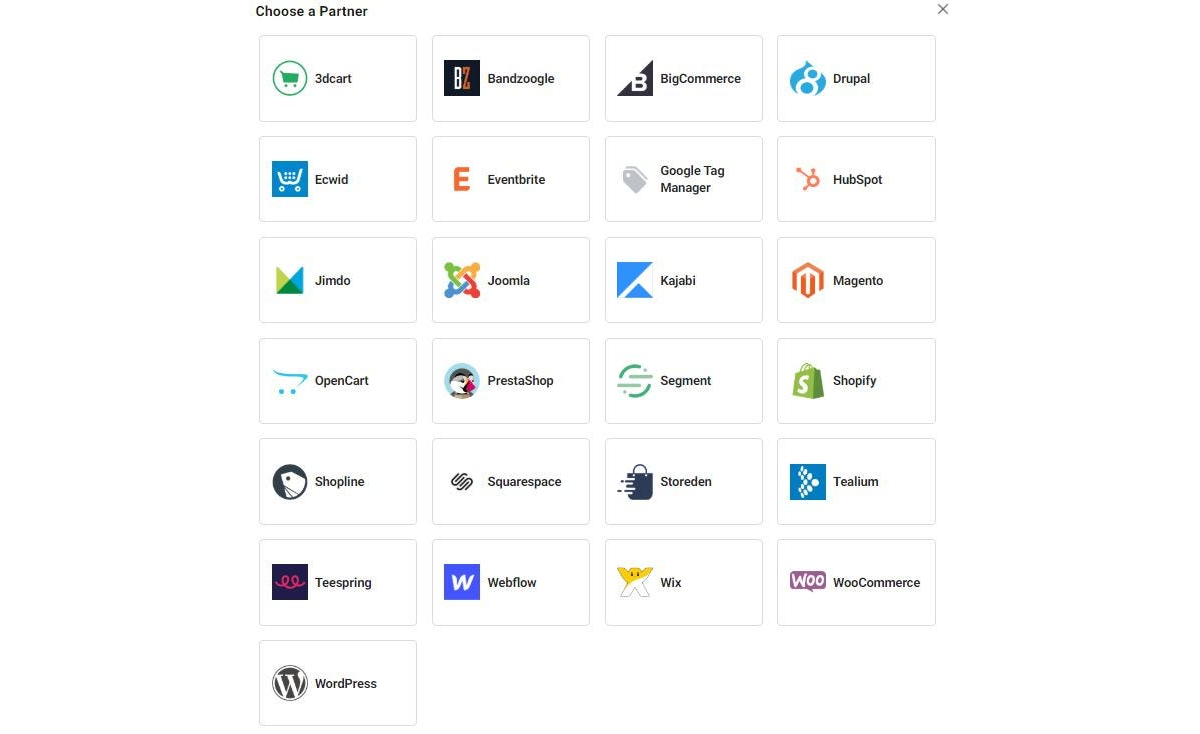
Facebook has partner integrations with:
If you want to set up Conversions API through one of these platforms, Facebook has an automatic set up process for each one. Just click the platform you want and follow the prompts.
If you want complete control of your Facebook CAPI implementation or are using a platform without a native integration, you’ll have to resort to setting it up manually, which will require a degree of coding knowledge.
If you don’t have coding knowledge or access to a developer, first you should try what’s possible with Zapier’s Facebook Conversion integration, which you can “custom” integrate various other platforms without any coding. They also have a blog post with ideas for integrating the Conversions API with other platforms.
If you do go for a custom implementation, you’ll be able to own and have full control over the data you collect, which has the following benefits:
A custom implementation of the Facebook CAPI will look something like this:
You can learn how to set this up with Elevar’s guide.
For most folks, implementing the Facebook Conversions API will be a first step toward server-side tracking.
As mentioned above, there are a lot of benefits to server-side tracking and based on current privacy and data trends, we expect to see server-side tracking relied on a lot more.
Here’s what I recommend considering next:
Whether you choose automated integrations or a custom implementation, CAPI offers benefits like centralized tracking, data protection, and 1st party tracking. It's a step toward server-side tracking, which is likely to become more prevalent in the future.
Remember, the more accurate your data is, the better Facebook will be able to optimize your ad campaigns for your desired result and the more accurate any Facebook ad automations you have set up will perform.
So, take the necessary steps to prepare your business for the cookieless world and stay ahead in the game.
The Facebook CAPI (CAPI) is a server-side API that allows businesses to send conversion data directly to Facebook from their servers.
This means that businesses can track conversions even if users have cookies blocked or disabled.
Whether or not you need the Facebook CAPI depends on your specific needs.
If you are able to track conversions accurately using cookies, then you may not need CAPI.
However, if you are concerned about the impact of cookie blockers and other privacy settings, then CAPI is a good way to ensure that you are tracking conversions accurately.
The Facebook Pixel is a piece of code that you can add to your website to track conversions and other events. The Pixel works by sending data about user activity to Facebook servers.
The Facebook Conversions API is a server-side API that allows you to send conversion data directly to Facebook from your servers.
Users that have Ad blockers or deny cookie consents don't have their events tracked by the Facebook Pixel.
Facebook CAPI tracks all server events you're familiar with the Facebook Pixel. A few examples are bellow
The Facebook Conversions API has several benefits, including: